Create a dynamic menu with Oof
This tutorial will show you how to create a dynamic menu with Oof, without using icons.
You will find in this post the different steps to get there.
Note : to make this tutorial, we used the Rectangle component, the BitmapRectangle component, text components and the minimal_best layout.
Step 1
: Create your dynamic menu
For that, add the RichTextList and the DataSelector components.

- Then configure them
-
- the RichTextList component
-
- the name
- name it “list”

-
- edit your labels
- it’s the name of your categories (here
- Home, Who ?, What ?, Where ?)
-
- edit your data
- it’s the name of your pages that correspond to your categories (here
- homepage, whopage, whatpage, wherepage)

- Note : to edit your labels and data, click on “edit”, click on the “+”, enter your text, click on the “+” to add another label (or data). When you have done, just click on “ok”. Of course if you forget a label (or a data) you can click on “edit” again and add it. You can also delete an item or copy it
- for that, select your item by checking the box to its left, and click on the red “x” if you want to delete it, or on the square to copy it. If you want to change the order of your items (or data) drag and drop it to the wanted position.

-
the DataSelector component
-
- the name
- DataSelector
-
- the list name
- put the name of your RichTextList (here
- list)
-
- the cell content
- «label»
-
- the deeplink format
- «data»

-
- the page’s name
- «data»
-
- the “icon” box
- check it

And it’s done !
Note : the DataSelector component has the icon property. So, if you want to put a particular layout for your pages transition, you have to choose the wanted layout on your DataSelector properies.
The cell content corresponds to the list content that appears on the stage.
The deeplink format correponds to what appears on the URL. And the page’s name corresponds to the name of the xml pages.
Step 2
: Customize your dynamic menu
- the RichTextList
To change the visual aspect of your menu, you have to parameter your RichTextList (named “list”).
- if you want a vertical menu or an horizontal menu, just change the number of “items per row”
In this tutorial, we have an horizontal menu with 4 categories, so we have 4 items per row.
If you want a vertical menu, whatever the number of categories, put 1 item per row.
-
place your menu where you want on your publication by using the x and y parameters
-
change the width and the height of your menu

You can also change the font, color, size, etc… of the text that corresponds to your categories.
For that, when you edit your text in the “labels”, edit it in html.
- For this tutorial, we have edited our labels in that way

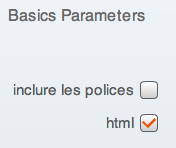
Note : to edit in html, verify that the “html” box is well checked

This tutorial is finished !


